
3 posts tagged with "MapTool 1.10"

View All Tags

· 5 min read

Issues with HTML/CSS/JavaScript Prior to MapTool 1.10#

Prior to MapTool 1.10 creating HTML pages is unnecessary cumbersome. To create HTML dialogs, frames, and overlays you use the following roll options.

  • [frame(): { } ]
  • [frame5(): { } ]
  • [dialog(): { } ]
  • [dialog5(): { } ]
  • [overlay(): { } ]

The HTML is included in the [ ] which means it has to processed by the MTScript parser. This has both benefits and drawbacks. The main benefit is that you can use [ ] to execute MTScript elements as a form of templating the HTML, for example

[frame("test): {    [r: getName() ]}]

The major drawback is that everything included must be able to pass through the MTScript parser, often this will not be the case especially where CSS or JavaScript are concerned. You can work around this problem by using macros functions to fetch text from macro, for example:

[frame5("test"): {    [r: getMacroCommand(number(getMacroIndexes("test/test.html"))) ]}]

Changes in MapTool 1.10#

In MapTool 1.10 there is a change that allows you to access properties and macros on Lib:Tokens via a URI of the form

  • lib://<token name>/macro/<macro name>
  • lib://<token name>/property/<property name>
note

By default the text fetched using the URI is cached, if you make changes to the content it will not be reflected until you restart MapTool. To work around this you can add the cachelib=false query string as show in examples later on in this post.

Where <token name> is the name of the Lib:Token after the Lib: prefix, for example Lib:HTMLTest would be HTMLTest

Allowing URI access#

There are no special requirements on ownership for the Lib:Token, to allow URI access to Lib:Token properties and macros, anyone will be able to access these values via a URI if the "Allow URI Access" flag needs is set, you can do this via the edit token dialog. Allow URI access

or the setAllowsURIAccess() macro function.

Reserved names
Some names are reserved for future internal usage and you will not be able set the "Allows URI Access" flags on Lib:Tokens
Reserved names are: Lib tokens with the following names (after the lib: part)
  • rptools
  • maptool
  • maptools (because people often call it maptools)
  • internal
  • builtin
  • standard
Lib tokens starting with the following names (after the lib: part)
  • rptools.
  • maptool.
  • maptools. (because people often call it maptools)
  • tokentool.
  • net.rptools.
  • internal.
  • _
  • builtin.
  • standard.
  • .

Macro functions#

Two new MTScript functions have been added that allow you to set or get the "Allows URI access" flag for a token. These can only be run from a trusted macro.

  • getAllowsURIAccess([<token name>], [<map name>])
  • setAllowsURIAccess(<0|1>, [<token name>, [<map name>])

Uses for lib:// URIs#

Lib:// URIs are useful for both CSS and JavaScript inclusion in HTML files, creating frames/dialogs/overlays with HTML, and the js.evalURI() MTScript functions.

Including JavaScript and CSS in HTML using a lib:// URI#

<html>  <head>    <link      rel="stylesheet"      href="lib://HTMLTest/macro/test/test.css?cachelib=false"    />  </head>  <body>    <h1>This is a test</h1>    <div id="test1" />    <script src="lib://HTMLTest/macro/test/test.js?cachelib=false"></script>    <img src="asset://87f4e9bfa4f1f3db250b57b3599fa4e9" />  </body></html>

This will include CSS from the macro called test/test.css and the JavaScript from a macro called test/test.js on the Lib:HTMLTest token.

Creating frames/dialogs/overlays using a lib:// URI#

There are also new MTScript functions that allow you to create frames/dialogs/overlays by passing a lib:// URI which contains the HTML. These are

  • html.dialog(<dialog name>, <libURI>, [<options>])
  • html.dialog5(<dialog name>, <libURI>, [<options>])
  • html.frame(<frame name>, <libURI>, [<options>])
  • html.frame5(<frame name>, <libURI>, [<options>])
  • html.overlay(<overlay name>, <libURI>, [<options>])

The optional "options" argument contains the same arguments and format as the frame/dialog/overlay roll options

Relative paths#

When using the following functions

  • html.dialog5(<dialog name>, <libURI>, [<options>])
  • html.frame5(<frame name>, <libURI>, [<options>])
  • html.overlay(<overlay name>, <libURI>, [<options>])

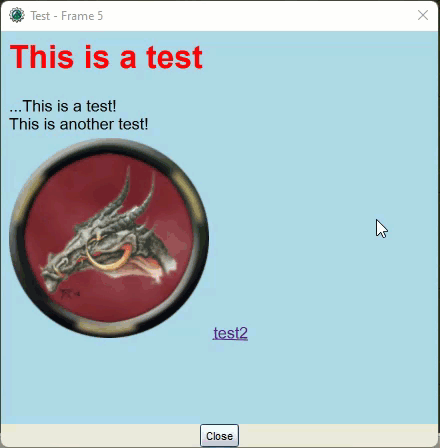
The URLs in the HTML file can also be specified using relative paths, for example Given

Relative paths macros

If the HTML is loaded from test/test.html you can use relative paths for the other macros as below

<html><head>    <link rel="stylesheet" href="./test.css?cachelib=false"></head><body>    <h1>This is a test</h1>    <div id='test1'/>    <script>        document.getElementById('test1').innerHTML = '...This is a test!';    </script>    <script src="./test.js?cachelib=false"></script>    <img src="asset://87f4e9bfa4f1f3db250b57b3599fa4e9"/>    <a href="./test2.html">test2</a></body>

This will even work for hyperlink navigation as seen in the link to ./test2.htlm aboove

Relative Path Navigation Example

Running JavaScript from a lib:// URI#

In addition to being able to include JavaScript in HTML via the <script> tag, lib:// URIs can be used to execute JavaScript via the js.evalUI()macro function.

  • js.evalURI(<namespace>, <libURI>, [arg1, ... argN])

Where

  • <namespace> is the namespace of the JavaScript context to run the script in.
  • <libURI> is the lib:// URI to fetch the JavasScript from.
  • [arg1, ... argN] is a comma-separated list of arguments to be passed to the script

· 7 min read

Authentication types#

Prior to version 1.10 MapTool only supported a single method of authentication which is role based authentication. Each Role (GM and Player) has a password and any client that connects and authenticates with either of these passwords gets that role. There is no restriction player names other than everyone has to have a unique name.

In MapTool 1.10 there are three authentication methods.

  • Role based
  • Player specific passwords
  • Public Key

Using Player Specific Authentication#

For player specific passwords and public keys authentication a password file must be used as these require that the name of the players are fixed so that they can be matched to the specific password or public key. When starting the server you can specify that a password file is used. Start Server Dialog

This will load the password file or create a new one if it doesn't exist.

Clients Connecting With Public Keys#

So that the user does not have to type in a password that will not be used they can check "connect using public Key" from the connect to server dialog.

Connect To Sever Dialog

They do not have to check this box as if the server requests the client attempts to authenticates via public key the client will do so even if the user has specified a password. If this value is checked the only way the client can authenticate is via public key so any password in the password text field will be ignored.

Adding, Editing, or Removing Players#

The menu option to edit player passwords is under the file menu. Player Database Menu Option

This opens the player database dialog which can be used to add, edit, and remove players. This dialog shows the following information

Player Database#

Edit Player Dialog

  • Player name
  • Role, Player or GM
  • Authentication Type, Password or Public Key
  • Is the player Blocked Blocked players will not be able to log in. When they try to connect they will get a message with a reason that they are blocked.
note

New, Added, or Modifications to players take effect immediately but the changes will not be written to the password file until this dialog is closed (either with Ok button or dialog close button). This is so that the file will not be continually overwritten many times when making several changes at once.

Adding or Editing Player#

Clicking on the Edit or Add button will open a dialog where you can provide the player details. Edit Player Dialog 
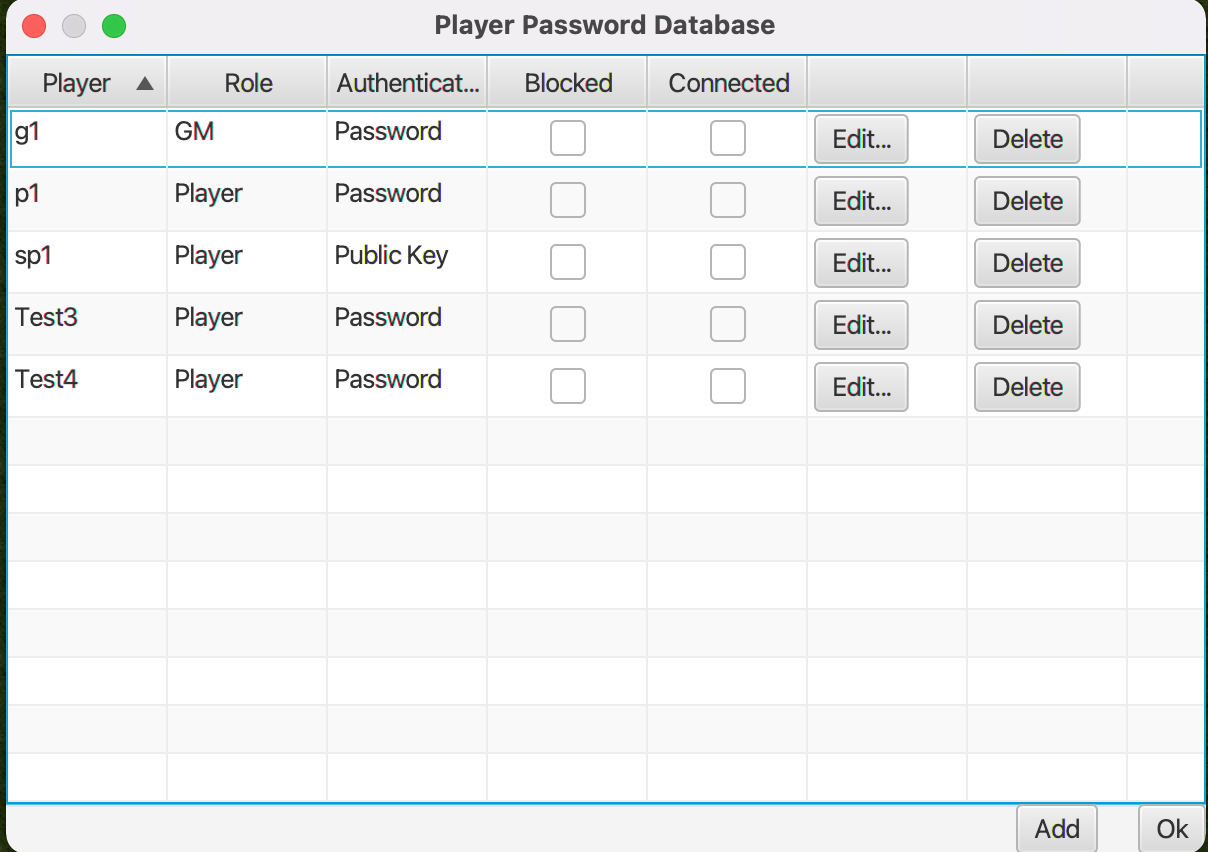
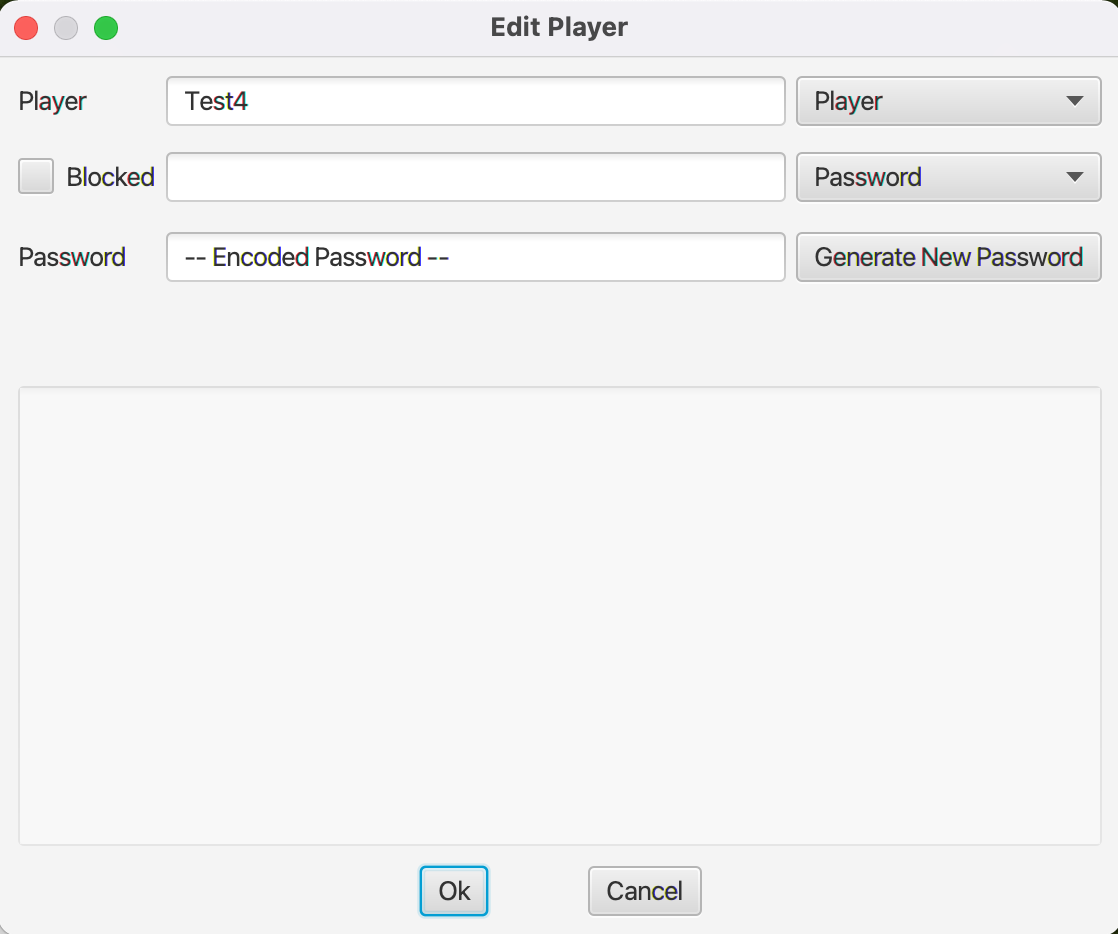
This dialog is used to provide the information required for the player database entry.

  • Player Name (only editable for Add)
  • Role, Player or GM
  • If the player has been blocked from logging in, and if so the reason why
  • Authentication Type, password or public key
  • Player Password (only if authentication type is password)
  • Public Key (only if authentication type is public key)

The password is hashed which is a one way operation, so you will not be able to see a players password so if you and the player forget it you will have to change it to a new one.

Its recommended that if you want to use player specific authentication you use public keys as that way neither you or the player will need to remember the password. You can add more than one public key in the public key text field so you can easily support players who have multiple computers.

If you still prefer to use a password over a public key it is strongly recommended you use the Generate New Password button so that no one is sharing passwords they may be using elsewhere.

note

Setting a plyer to blocked will not kick the player, it will only stop them from attempting to connect to the server. You will need to kick the player if you also want to remove them immediately. At this time kicking a blocked player will not send them the reason that they are blocked/kicked but will do so in a future version.

Obtaining The Players Public Key#

There is a new Authentication tab on the preferences dialog which contains the public key for your client. If you have multiple machines each will have its a different public key, its also possible if you have multiple versions installed with different data directories then these may also have different public keys.

Players Public Key

You can regenerate your public key but if you do so then you will not be able to connect to any server that has your old public key so you will need to ensure you let the person running the server know that your public key has been changed.

Your public key is also stored in the file .maptool-rptools/config/public.key (or equivalent data directory).

Warning: Your private key is also stored in this directory, do not share this with anyone as if they have both your public and private key they will be able to log in as you on other servers your public key is registered with.

Password File#

The location of the password file -- assuming the standard data directory -- is .maptool-rptools/config/passwords.json always ensure that you make a backup before editing it as if you make mistakes and you don't have a backup you may need to regenerate new passwords for all players. Also never update the password file while the server is running. Public keys for players are stored in the the .maptool-rptools/config/keys directory. If you use multiple computers or share GM duties with someone else you can copy the passwords.json file and keys directory and place them in the same directory on the second computer as they contain nothing specific to the computer it was generated on. You should still endeavour to make sure that this password file is shard with as little number of people as possible. Also never use passwords that you have used anywhere else in this file even though they are hashed. If you must use passwords use the button to generate new passwords, but you should prefer public keys!

Format of the Password File#

The password file uses json format.

  "passwords": [    {      "username": "p1",      "password": "/49vX2/i/5YhQZTaalYnoA",      "salt": "DZAp3sKZSY/vWuLfTG26mhQbOx5PLNT0tRdNvTNMn8KjDlY3jJg180ZBN56ehfkygOk6v0CgySZaufGkOKj7RqOwudzoWZhtNGSabkbI4s85TG7Ecfz8HQQRfIi1XtWrlqkrnuiyD8zQFg9zNr0xvQlUwzL5UOK7emt/xPr2QfU",      "role": "Player"    },    {      "username": "sp1",      "publicKeys": [        "pk1.key"      ],      "role": "Player"    },    {      "username": "g1",      "password": "9SH7OrqlXyRMrSXy2fQHaw",      "salt": "LOWXSGZ5tNeCwVpzNFuK/4EC+9jHMPmgpZ3Q05kElZyJKSWk0dGQOuZWADH2ZYAs4UvN3DVczMbAO6Dm5+NdnvsZsb/SnZ/xEM0QZ5yvmOh0bGjWEHwqTwFBbRUrzlpzy1nNKdJU8e7G2qWmaLUCDSV5Ut50l9aBfeL29d5btLA",      "role": "GM"    },    {      "username": "Test4",      "password": "ZyZpHxUR18RdhQpFk4n+jA",      "salt": "SucHGWjcbeDcegZo8A6jekB56iICulF3OtbcomJ+MsShuhKrrls2ZE+T25aTj/xAFu5wZlfE129LgBYvw/C3q2zeEyvjEmXprq5rzW8+c8VaXIRPSHbz5ursX5pRL8qcxbsCm4RFozld6R9/P6+IC3TC3DWoq6CRsvzHpIO2Nnc",      "role": "Player"    },    {      "username": "Test3",      "password": "EyFrs4pM6Euy5zQLHrFoOw",      "salt": "Fpvg/PJZGIp7N68OmxMaEGOA1mo4vdg7KoRUDik3Q6P6VovI0YOOdNi3iyo9WgcuukhXjlSoxBqG3Cz/hNQRVVgsXdGwcb86K20imFBbfyzpuNt3a/51u9HTQuYoE8FzzNsTdCI/VPmyQjgvP+AwSYT0i7m/GRXdtugoOWGnDgY",      "role": "Player"    }  ]}

A player entry that uses a public key will look like the following

    {      "username": "sp1",      "publicKeys": [        "pk1.key"      ],      "role": "Player"    }

The value in publicKeys is the name of the file in the keys directory that contains the public keys for the player.

A player entery that uses a password will look like the following

    {      "username": "Test3",      "password": "EyFrs4pM6Euy5zQLHrFoOw",      "salt": "Fpvg/PJZGIp7N68OmxMaEGOA1mo4vdg7KoRUDik3Q6P6VovI0YOOdNi3iyo9WgcuukhXjlSoxBqG3Cz/hNQRVVgsXdGwcb86K20imFBbfyzpuNt3a/51u9HTQuYoE8FzzNsTdCI/VPmyQjgvP+AwSYT0i7m/GRXdtugoOWGnDgY",      "role": "Player"    }

The password field contains the hashed password for the player, the salt field is a randomised value that is used in the function used hash the password.

If you want to add players you will not be able to -- or be expected to -- generate the hashed password and salt instead you can instead specify the plaintext password and no salt like the following.

    {      "username": "Test3",      "password": "You-Are-Using-A-Random-Password-Arent-You?",      "role": "Player"    }

Then the next time the server is started this file will be read and the password will be hashed and the file overwritten to only contain hashed passwords and the salt for the password. This will also generate a passwords.json.backup before overwriting, ensure that you delete this file after testing as it contains then non hashed version of the passwords. But you did remember to use randome passwords and not passwords that you use elsehwere correct?

· 3 min read

Callouts#

One of the new additions in MapTool 1.10 is the ability to override the name that appears in the speech or thought bubble callouts in MapTool.

For those that are not already familiar with the functionality MapTool provides the ability to display the following callouts on all clients

  • Pointer - Spacebar
    Pointer

  • Speech Bubble - Control + Spacebar
    Speech Bubble

  • Thought Bubble - Shift + Spacebar
    Thought Bubble

  • Pointing Finger - Control + Shift + Spacebar
    Pointing Finger

Setting the Speech/Thought Callout Name#

Previously these callouts always render the name of the player regardless of where the callout is or impersonation status. In MapTool 1.10 tokens can have a speech name, this can affect the name displayed for both thought and speech bubbles when the mouse pointer is over the token, or the token is impersonated.

This can be set when dragging a new token on to the map
New Token Dialog

Or by editing existing tokens. Edit Token Dialog

Or via macro.
setSpeechName("Speech bubble name", tokenId)

Related Macros#

There are two related macros getSpeechName() which returns the speech name for the current token. There is also a trusted variant getSpeechName(tokenId) which will return the speech name for the token with the specified id.

setSpeechName(SpeechBubbleName) sets the speech name for the current token. There is also a trusted variant setSpeechName(SpeechBubbleName, tokenId) which will set the speech name for the token with the specified id.

Examples#

In the following examples the speech and thought bubbles look different to previous versions as another fix in MapTool 1.10 is to size them dynamically so large names wont be rendered outside of the bubbles.

No impersonated token or token under mouse No Token

Token with Speech Name Token With Speech Name

Token with really long speech name Really Long Name

Both the eagle and the Dragon have a speech name Impersonated

Mage and Familiar with Speech Name, mouse over Mage Mage

Mage and Familiar with Speech Name, mouse over Familiar Mage

Determining which name is displayed#

In general when deciding which name to use in speech and thought bubbles MapTool will attempt to show the name associated with the following precedence

  1. Token under the mouse with speech name(if player owns it or is GM)
  2. Impersonated Token with speech name
  3. The players name

Below is a more detailed overview of the logic if you really want to know what it is.

flowchart TD; Start([Start]) --> mouseOver{Mouse Over<br/>Token} --> |Yes| isOwner{Player Owns} mouseOver --> |No| impersonated isOwner --> |No| impersonated{Token<br/> Impersonated?} isOwner --> |Yes| hasSpeechName{Has Speech<br/> Name} hasSpeechName --> |Yes| speechName[Use Token<br/>Speech Bubble Name] hasSpeechName --> |No| impersonated impersonated --> |No| playerName[Use Player Name] impersonated --> |Yes| impersonatedHasSpeech{Token Has<br/>Speech Name?} impersonatedHasSpeech --> |Yes| impersonatedSpeech[Use Impersonated<br/>Token Speech Name] impersonatedHasSpeech --> |No| playerName

If there are multiple tokens under the mouse (e.g. a Token Stack) and at least one has a speech name then the following logic will be used to determine which is used.

flowchart TD; Start([Start]) --> hasImpersonated{Token<br/> Impersonated?} hasImpersonated --> |Yes| impersonatedUnder{Impersonated Token<br/>in Stack?} impersonatedUnder --> |Yes| useImpersonated[Use Impersonated<br/>Token Speech Name] impersonatedUnder --> |No| topHasSpeech hasImpersonated --> |No| topHasSpeech{Top Token<br/>Has Speech Name?} topHasSpeech --> |Yes| useTop[Use Top Token<br/>Speech Name] topHasSpeech --> |No| useOther[Use Any Token<br/>in Stack<br/>Speech Name]